Installing “Save For Web” On Windows GIMP
 In my previous blog post, I have discussed the importance of saving images for the web in a way that they will have the smallest file size possible so that uploading them, opening the site and downloading the image will be as fast as we want. I have also mentioned that Adobe PhotoShop, a proprietary image editing software, has “Save for Web” feature by default. The free and open source GIMP (GNU Image Manipulation Program) which functions the same as Adobe PhotoShop does not have the “save for web” but you can easily add the plugin for such feature.
Adding the “Save for Web” plugin to GIMP installed on Windows is the topic of this article. I hope that this blog will be useful to some co-bloggers who do not know about it. Likewise, I suggest to Internet café owners to have the software on their servers so that they could save the images correctly for their customers who would upload them to their social networking accounts.
If you do not yet have GIMP installed in your Windows computer, you can download the installer at http://www.gimp.org/windows/. After installing, launch GIMP and open a JPG, PNG or BMP image file. Click “File” and you will see that there is no “Save for Web” in the Save As options. The following are what you should do to install on Windows GIMP the “Save for Web” feature that you need in order to save images with very small file size:
- Download the “Save for Web” plugin from http://registry.gimp.org/files/save_for_web_0.28.6_win32.zip
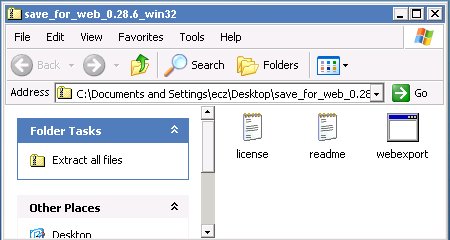
- Transfer “Save for Web” plugin on the desktop and then extract and you will see this.

- Copy ‘webexport.exe’ file to your personal plug-ins folder which in my case can be found at C:\Documents and Settings\ecz\.gimp-2.6\plug-ins.
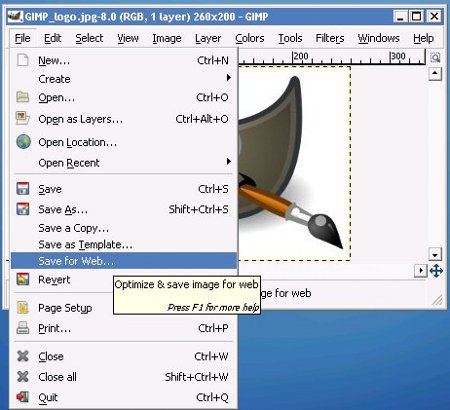
After installing the “Save for Web” plugin on your Windows GIMP, the ‘File – Save As’ option in your program should now look like this:

There you have it, you now have GIMP image editing software with “Save for Web” feature. In my future blogs, I will discuss how, as a dummy user, do I prepare the images I upload to this blog using this software. Watch for it!


Latest Feedbacks